How to Add an Account on Facebook Messenger
Thanks to an update rolled out by Facebook recently, you can now add multiple accounts in Facebook Messenger on Android. By rolling out this feature, Facebook wants your family to use Messenger easily on a shared device.

This feature lets multiple people use Facebook Messenger from a single, shared device. Wondering how is this possible? In this tutorial we show you how to add multiple accounts in Facebook Messenger on Android so that all your family members can share a single device to keep in touch with their friends without having to use a different device.
How to add multiple accounts in Facebook Messenger on Android
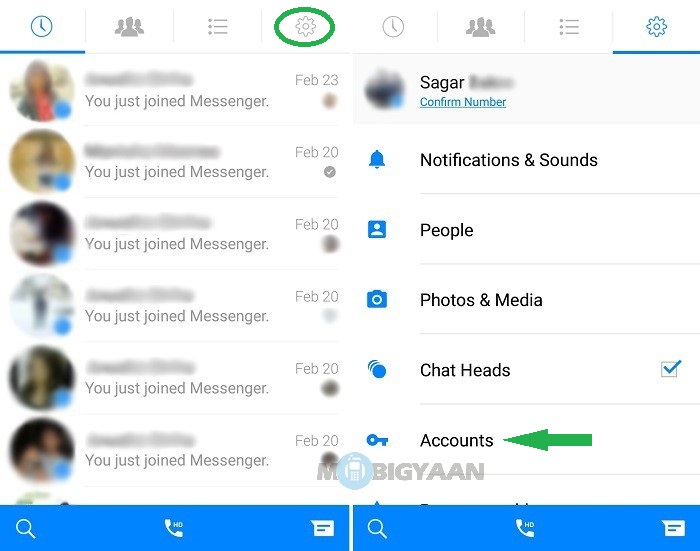
Step 1: The very first thing to do is download the Facebook Messenger app on your Android if you haven't already. You can download it from the Google Play Store. As soon as you are logged-in, you will see all your chats. Tap on the 'Settings' icon located at the top-right corner. Upon doing so, you will be taken to the Settings section. Tap on 'Accounts' located below the Chat Heads option.
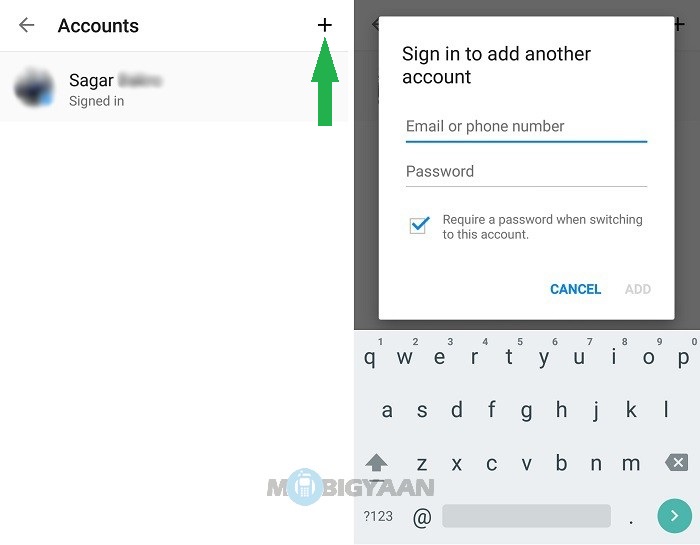
Step 2: Upon tapping on the Accounts, you will be taken to the Accounts section. Tap on the '+' icon located at the top-right corner to add another account. After that, you will be asked for the login details of the account you want to add in the Facebook Messenger.
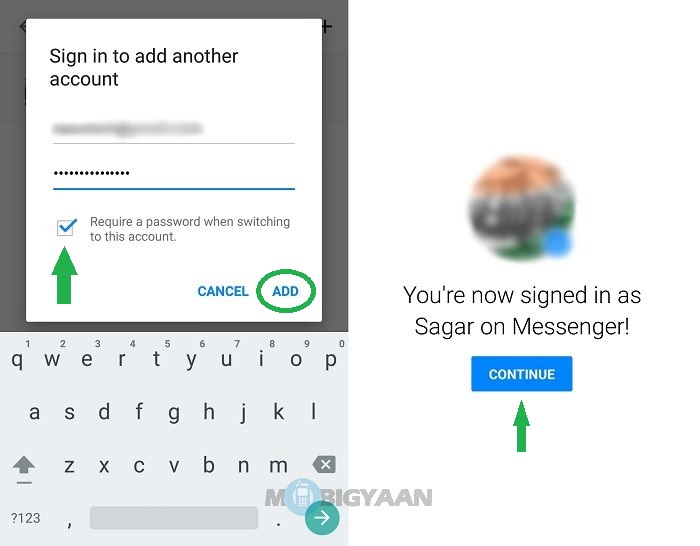
Step 3: As soon as you enter the login details of the account you want to add in the Facebook Messenger, make sure you 'tick the check box'. What it will do is the Messenger will ask for a password whenever someone tries to switch to this account. Tap on 'Add' to log-in. Messenger will successfully sign you in with the new account. Tap on 'Continue' to start using Messenger.
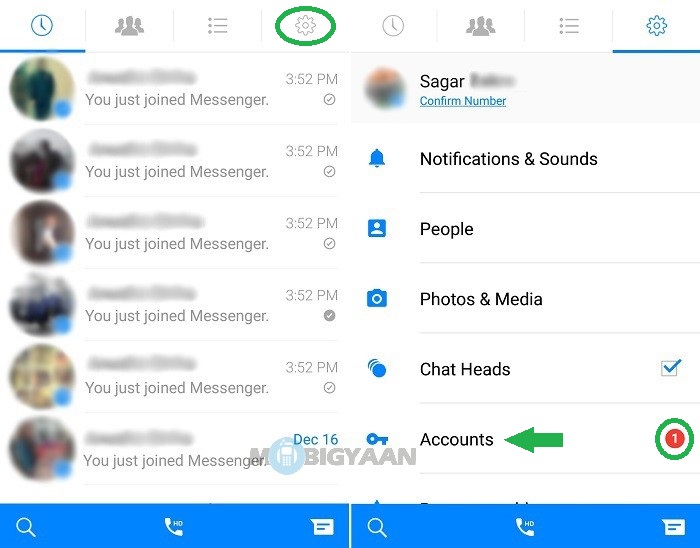
Step 4: As soon as you tap on 'Continue' you will be taken to the chats of the account you signed-in with. In order to switch to another account, tap on the 'Settings' icon and then on 'Accounts'. Messenger will show the number of notifications alongside the 'Accounts' option instead of showing the messages.
Step 5: Tap on the account you want to switch to and then tap 'Continue'. Upon doing so Messenger will sign you in with the account you tapped on.
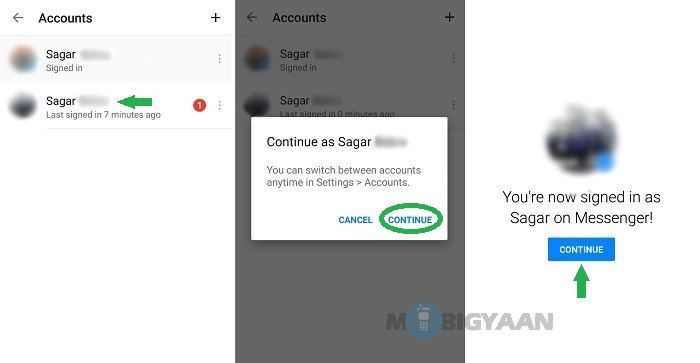
Upon tapping 'Continue' you will see all the chats that belong to the account you switched to. If you think this doesn't leave any room for privacy, don't worry as Messenger will ask for a password of the account someone wants to switch to (unless of course if the person selected the option to require a password when switching to an account while adding his account for the first time).
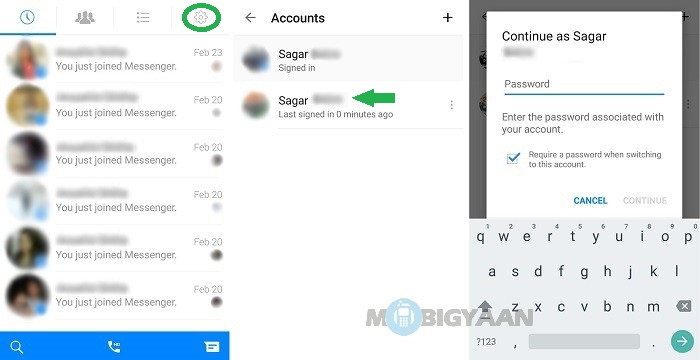
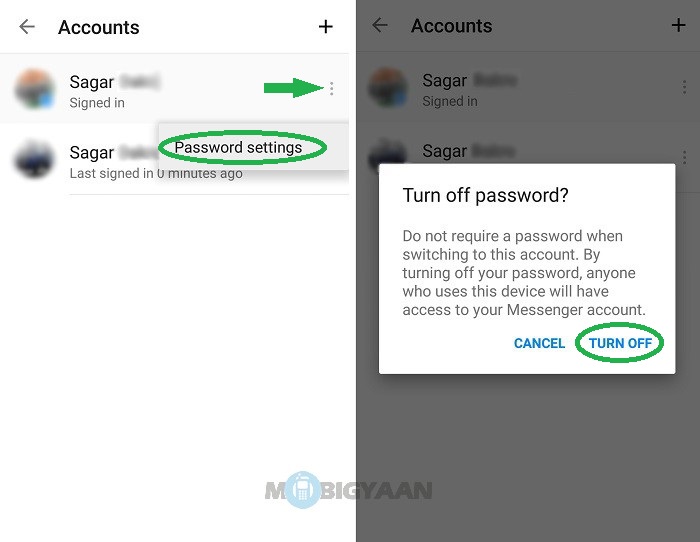
Step 6: You can always turn off the password requirement by tapping on the 'three dot menu' against the account name, then tapping on 'Password settings' and confirming the selection by tapping on 'Turn Off'. Do keep in mind that turning off your password will let anyone with access to the device access your Messenger account.
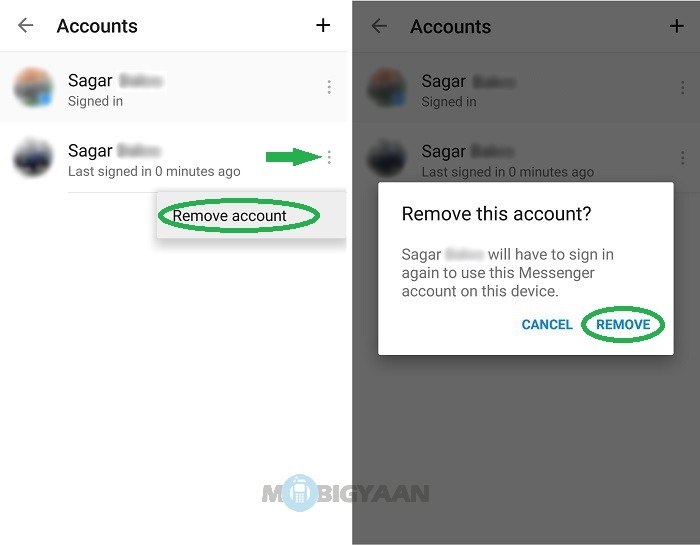
Step 7: If you want to remove your account from the Facebook Messenger, simply tap on the 'three dot menu' provided alongside the account you want to remove. Then tap on 'Remove account' and confirm the action by tapping on 'Remove'.
We hope you were able to add multiple accounts in Facebook Messenger on Android with the help of this tutorial. Do share your experience with us if you added multiple accounts in Facebook Messenger on your Android device. For more such tutorials, head on to our How-To Guides section.
How to Add an Account on Facebook Messenger
Source: https://www.mobigyaan.com/how-to-add-multiple-accounts-in-facebook-messenger-on-android
0 Response to "How to Add an Account on Facebook Messenger"
Post a Comment